
ROS Basics – Use Action by Implementing Action Client
In previous blogs, we have already defined an action message and implemented action server. Now we will learn how to implement an action client that will use the action.
Creating Action Client
We will implement an action client for the action “Timer.action”. The easiest and simple way is to use the action by creating the object of the “SimpleActionClient” class of the package “actionlib”
We will create action client file in the same package “ros_basics” that we are already working with.
Go to the package
Run the command
roscd ros_basics/src
Also run
ls
(To verify that the action_client file is not already created.
Now create the file “action_client.py”
For this run the command
touch action_client.py
Run the command to give execute permission
chmod +x action_client.py
Open the file using “gedit” command
gedit action_client.py
Copy and paste following code in it.
#! /usr/bin/env python
import rospy

import actionlib
from ros_basics.msg import TimerAction, TimerGoal, TimerResult

rospy.init_node('timer_action_client')
client = actionlib.SimpleActionClient('timer', TimerAction)
client.wait_for_server()

goal = TimerGoal()
goal.time_to_wait = rospy.Duration.from_sec(5.0)

client.send_goal(goal)
client.wait_for_result()

print('Time elapsed: %f'%(client.get_result().time_elapsed.to_sec()))
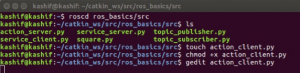
All above executed commands are shown in figure below
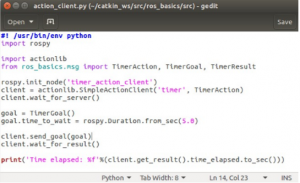
The file “action_client.py” will look like in figure below
Save and close the file
Explaining the Code in Python file “action_client.py”
We will go through the key key parts of the code.
#! /usr/bin/env python
import rospy
import actionlib
from ros_basics.msg import TimerAction, TimerGoal, TimerResult
rospy.init_node(‘timer_action_client’)
(These lines are just for import and initialization of node as explained previously).
client = actionlib.SimpleActionClient(‘timer’, TimerAction)
client.wait_for_server()
(In above lines, we created an object client of the class “ SimpleActionClient”. The first argument is “timer” which is the name of the action server. The client will use this name “timer” to determine the topics that the client will use while communicating with the server. This name “timer” must match with the name that we used to create the server. You may have already noticed that we used the same name “timer” at both sides (while implementing action server and action client). The second argument “TimerAction” is type of the action. It should also match with that of the server.
In next line, the client is waiting for the server. For this it checks if the five topics (that we have seen in previous blog while testing action server) are advertised. When the five topics are advertised the control move to the next line).
goal = TimerGoal()
goal.time_to_wait = rospy.Duration.from_sec(5.0)
client.send_goal(goal)
(In above lines, we create the object goal of class type “TimerGoal”. Then we fill the amount of time that we want to timer to wait (here it is 5 seconds). Then we send the goal to the server).
client.wait_for_result()
print(‘Time elapsed: %f’%(client.get_result().time_elapsed.to_sec()))
(In above lines, first we wait for the result to receive. If everything is working properly, we will receive a result after five seconds. Next we use the function “get_result()” and then print the time using the variable “time_elapsed”, that we defined in result part of the “.action” file. Here the time_elapsed will be the time that is reported from the server and client object receives it.)
Executing “action_client.py” file
Now we will execute the file “action_client.py” and will verify if everything is working fine.
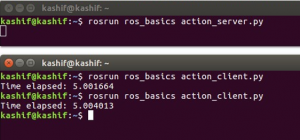
First open the terminal and run the action server
Run the command
rosrun ros_basics action_server.py
Now open another terminal and run action client
Run the command
rosrun ros_basics action_client.py
You may run this command several times to see what values are received.
You will see the output after executing the program as shown in figure below.
Congratulations! You have learn how to define action message and how to implement actions using action server and client.
So far we have implemented basic action server and action client. In next blogs we will implement a little more sophisticated action server and client that will also incorporate the feedback part of the action.